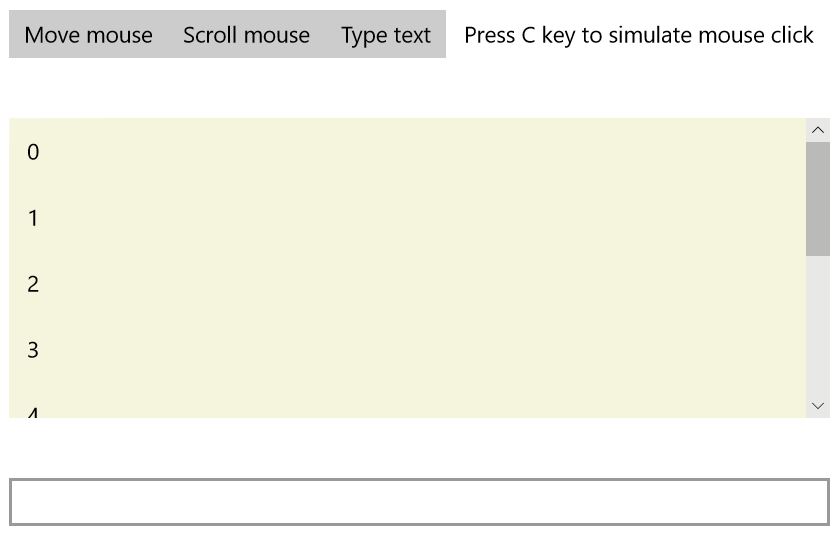
One of the less known capabilities of UWP apps is the ability to inject input. This is especially useful if you want to give the user a guided tour through the app, offer immediate feedback to users with assistive technologies or implement a remote help functionality into your app. In this article we will explore what the Windows.UI.Input.Preview.Injection namespace has to offer and how can you use it in your app.
Supported input types
Windows 10 supports several input types so does the input injector. Currently the list includes:
Gamepad
Keyboard
Mouse
Pen
Touch
We will show an example of keyboard and mouse input injection in this article.
Input injection capability
Before we utilize input injection, we have to declare this capability in the application manifest, as it is a non-standard functionality. It is a restricted capability, which means you can safely publish your app into the app store with it, but require approval for store submission. Adding the capability is simple. Open the Package.appxmanifest as XML file and add the following namespace declaration to the Package element:
<Package
   ...
   xmlns:rescap="http://schemas.microsoft.com/appx/manifest/foundation/windows10/restrictedcapabilities"
  IgnorableNamespaces="uap mp rescap">
The rescap namespace is home to the restricted capabilities. You can now declare the inputInjectionBrokered capability in the Capabilities section:
<Capabilities>
  <Capability Name="internetClient" />
  <rescap:Capability Name="inputInjectionBrokered" />
</Capabilities>
Basics
The main class in the Windows.UI.Input.Preview.Injection is the InputInjector. We can create it's instance by calling the static TryCreate method. Afterwards, we can call respective methods for each input type:
var inputInfo = new InjectedInputMouseInfo();
...
InputInjector inputInjector = InputInjector.TryCreate();
inputInjector.InjectMouseInput(new[] { inputInfo });
As we can see, the methods accept a list of input infos, so we can perform multiple input operations in succession.
Mouse input
We can prepare mouse input info using the InjectedInputMouseInfo class. To move the mouse we use the DeltaX and DeltaY properties:
var info = new InjectedInputMouseInfo();
info.MouseOptions = InjectedInputMouseOptions.Move;
info.DeltaY = 100; //move down 100 points
The MouseOptions property allows us to specify flags that affect what action should be performed. Among those are LeftDown and LeftUp, which we can use to simulate simple mouse click:
var down = new InjectedInputMouseInfo();
down.MouseOptions = InjectedInputMouseOptions.LeftDown;

var up = new InjectedInputMouseInfo();
up.MouseOptions = InjectedInputMouseOptions.LeftUp;

InputInjector inputInjector = InputInjector.TryCreate();
inputInjector.InjectMouseInput(new[] { down, up });
Mouse also has scrolling wheels and we can simulate both vertical and horizontal one using the Wheel and HWheel respectively. You can supply the scroll distance using the MouseData property:
var info = new InjectedInputMouseInfo();
info.MouseOptions = InjectedInputMouseOptions.Wheel;
info.MouseData = 500; //scroll up

InputInjector inputInjector = InputInjector.TryCreate();
inputInjector.InjectMouseInput(new[] { info });
Scrolling up is easy. But what about scrolling down?
info.MouseData = -500; //compile time error!
Suprisingly, MouseData property is a uint which makes it impossible to assign negative values to it. We can use overflowing to circumvent this however:
unchecked
{
    info.MouseData = (uint)-500; //scroll down
}
We have to use an unchecked block in this case, because we set the value as a constant and the compiler complains that the cast will cause numeric overflow. If we used a temporary local variable, we could avoid having to use unchecked. Mouse input also includes a TimeOffsetInMilliseconds property, which we can set to delay individual actions. This proves useful to properly simulate operations like a double-click.
Keyboard input
The InjectedInputKeyboardInfo class will the the base for keyboard input injection. The most important property is the VirtualKey, which specifies which key is the input related to. Using KeyOptions we can specify further options like simulating key up event. The following sample will print out string "hello" in the active input field:
InputInjector inputInjector = InputInjector.TryCreate();
foreach (var letter in "hello")
{
    var info = new InjectedInputKeyboardInfo();
    info.VirtualKey = (ushort)((VirtualKey)Enum.Parse(typeof(VirtualKey),
                                 letter.ToString(), true));
    inputInjector.InjectKeyboardInput(new[] { info });
    await Task.Delay(100);
}
There is a Task.Delay call at the end of the foreach loop which is not there just for the cool factor :-D . This ensures that repeated key presses are not registered as a single press, which would prevent the second letter L to be registered.
Sample code
The sample source code for this article is available on my GitHub.

Summary
We have explored the Windows.<wbr />UI.<wbr />Input.<wbr />Preview.<wbr />Injection namespace and seen how we can use it to simulate input from different types of input devices. Although not too commonly utilized, it is very nice to see this capability in the UWP API.